3. Demo Content Instructions
Before importing the content, please watch out these:
- Use WordPress Reset to clean the database and import the data from scratch if needed. After that, don't forget to pick Hunted from "Appearance > Themes" to see the theme.
- Please ensure that you've installed and activated all of the plugins before importing the data.
Step 1) Importing the Demo Content
- Navigate to "Tools > Import".
- Click WordPress.
- Click Browse and point the xml file you've got.
- Click Upload file and import and wait.
- When the page refreshes, assign authors from the drop downs, check Download and import file attachments and click Submit. You're done when the process is finished.
Back to Top
Step 2) Setting Your Menus
Please set the menu locations to see the menus properly. To do this, navigate to
"Appearance > Menus", select the menu you want to show and check one of the location checkboxes. Demo settings are like that:
(Menu Name : Menu Location)
toPrimary : Primary Menu
toHeader : Header Menu
toFooter : Footer Menu
Back to Top
Step 3) The Slider
To see the slider, please navigate to
"Appearance > Customize > 5. Slider Settings > 5.6. Blog Posts in Slider" and check
"Show Blog Posts in Slider".
Alternatively, go to
"Appearance > Customize > 5. Slider Settings > 5.4. Shortcode" and place the code below:
[new_huntedslider group="among"]
Back to Top
Step 4) Placing Your Widgets
Please navigate to
"Appearance > Widgets" and place your widgets like below:

- Hunted Widget: Post
- Post ID: 61
- Alternative Post ID: 67
- Choose Listing Style: "Style C"
- Lens Opacity: 30%
- Hunted Widget: Post
- Post ID: 51
- Alternative Post ID: 67
- Choose Listing Style: "Style C"
- Lens Opacity: 30%
- Hunted Widget: Post
- Post ID: 25
- Alternative Post ID: 67
- Choose Listing Style: "Style C"
- Lens Opacity: 30%
Note: Post ID values make sense if you've imported the demo content.
Back to Top

- Hunted Widget: Post
- Post ID: 65
- Alternative Post ID: 59
- Hunted Widget: Search
- Hunted Widget: Selected Posts
- Post 1 ID: 73
- Post 2 ID: 51
- Post 3 ID: 57
- Post 4 ID: 21
- Post count for "Style B": 2
- Post count for "Style C": 0
- Post count for "Style Z": 2
- Instagram Slider
- Username: isabellath
- Number of images to show: 9
- Template: Thumbnails
- Number of Columns: 3
- Hunted Widget: Recent Comments
- Number of comments to show: 3
- Hunted Widget: Social
- Hunted Widget: Image
- Hunted Widget: Tags/Categories
- Hunted Widget: Ads
<img src="https://www.burnhambox.com/hunted/wp-content/uploads/2016/06/hunted-banner-ad-3.png" />
Note 1: Please ensure that you've installed and activated all of the recommended plugins.
Note 2: Post ID values make sense if you've imported the demo content.
Back to Top
c) Home Widgets Placement

- Hunted Widget: Post
- Post ID: 47
- Choose Listing Style: "Style Z"
- Sponsored Text: Sponsored
- Hunted Widget: Post
- Post ID: 19
- Choose Listing Style: "Style Z"
- Hunted Widget: Category/Tag Posts
- Category slug: trending
- Title Color Scheme: "Light"
- Post count for "Style B": 1
- Post count for "Style C": 0
- Post count for "Style Z": 3
- Hunted Widget: Category/Tag Posts
- Category slug: featured
- Title Color Scheme: "Dark"
- Post count for "Style B": 1
- Post count for "Style C": 1
- Post count for "Style Z": 2
Note: Post ID values and category slugs make sense if you've imported the demo content.
Back to Top

- Text
- "Automatically add paragraphs" checked.
- Content:
<i class="fa fa-star" style="margin-right: 10px;"></i>Consetetur sadipscing elitr, <a href="#">sed diam nonumy eirmod</a> tempor invidunt ut labore et dolore magna aliquyam erat, sed diam voluptua.
<i class="fa fa-tree" style="margin-right: 10px;"></i>At vero eos et accusam et justo duo dolores et ea rebum. Stet clita kasd gubergren, no sea takimata sanctus est Lorem ipsum dolor sit amet.
- Hunted Widget: Post
- Post ID: 67
- Choose Listing Style: "Style E"
- Lens Opacity: 90%
- Hunted Widget: Tags/Categories
- Number of Tags to show: 12
Note: Post ID values make sense if you've imported the demo content.
Back to Top
Step 5) General Settings
a) Navigate to
"Settings > Reading" and;
Choose
"Your latest posts" for
"Front page displays".
Set the
"Blog pages show at most" to
12.
b) Navigate to
"Settings > Permalinks" and choose
"Day and name".
c) Navigate to
"Appearance > Customize" and set the values like below:
4. Header > 4.5. Logo Image: Pick the
Hunted logo from your media library or upload your own.
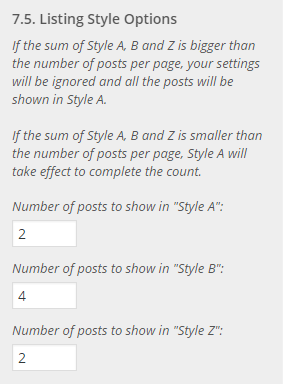
7. Layout Options > 7.5. Listing Style Options: Set all inputs to
4.
9. Post Format: Gallery > 9.1. Featured Image Options: Choose "Show featured image".
9. Post Format: Gallery > 9.2. Gallery Position: Choose "Instead of Featured Image".
10. Post Format: Video > 10.1. Featured Image Options: Choose "Show featured image".
14. Social Accounts: Write the URL addresses of your accounts that you'd like to see.
17. Banner Management: The banner placement choices on our demo site are
Below Home Widgets and
Post Pages (Below the Post). You can use the code below for your banners:
<img src="https://www.burnhambox.com/hunted/wp-content/uploads/2016/06/hunted-banner-ad-2.png">
Back to Top
Step 6) "MailChimp for WP" Settings
MailChimp for WordPress plugin must be installed and activated in order to display the newsletter bar on your site.

Here's the HTML code we use on our demo site:
<input type="email" name="EMAIL" placeholder="Your e-mail address" required /><input type="submit" value="SUBSCRIBE" />
You should place the MailChimp shortcode into the "Shortcode" field on your customizer. Please go to "Appearance > Customize > 12. Footer > 12.5. Newsletter Bar" and you'll see it over there.

If you have troubles regarding the usage of MailChimp, please visit this page to find out everything about it.
THAT'S ALL! If you followed the steps above, now you should have the same look with the demo site.
Something went wrong? Please
let us know.
Copyright Notice: All the images/photographs used in our demo site and all the rights of them belong to their creators/owners.
